Since new Update 1 of Dynamics AX we are able to create our own Workspace additional to preconfigured Standard Workspaces. Although preconfigured Worksapces can be customized by Users to their roles requirement, now new Workspaces can be created and filled with specific Tiles, Lists and Links.

Typically a Workspace is fitted to a specific business Role such as Order Management or Cost Managment and we won’t modifiy this Workspace used by emplyoees doing their job starting in this Workspace. It’s their Home Workspace an we won’t take it away.
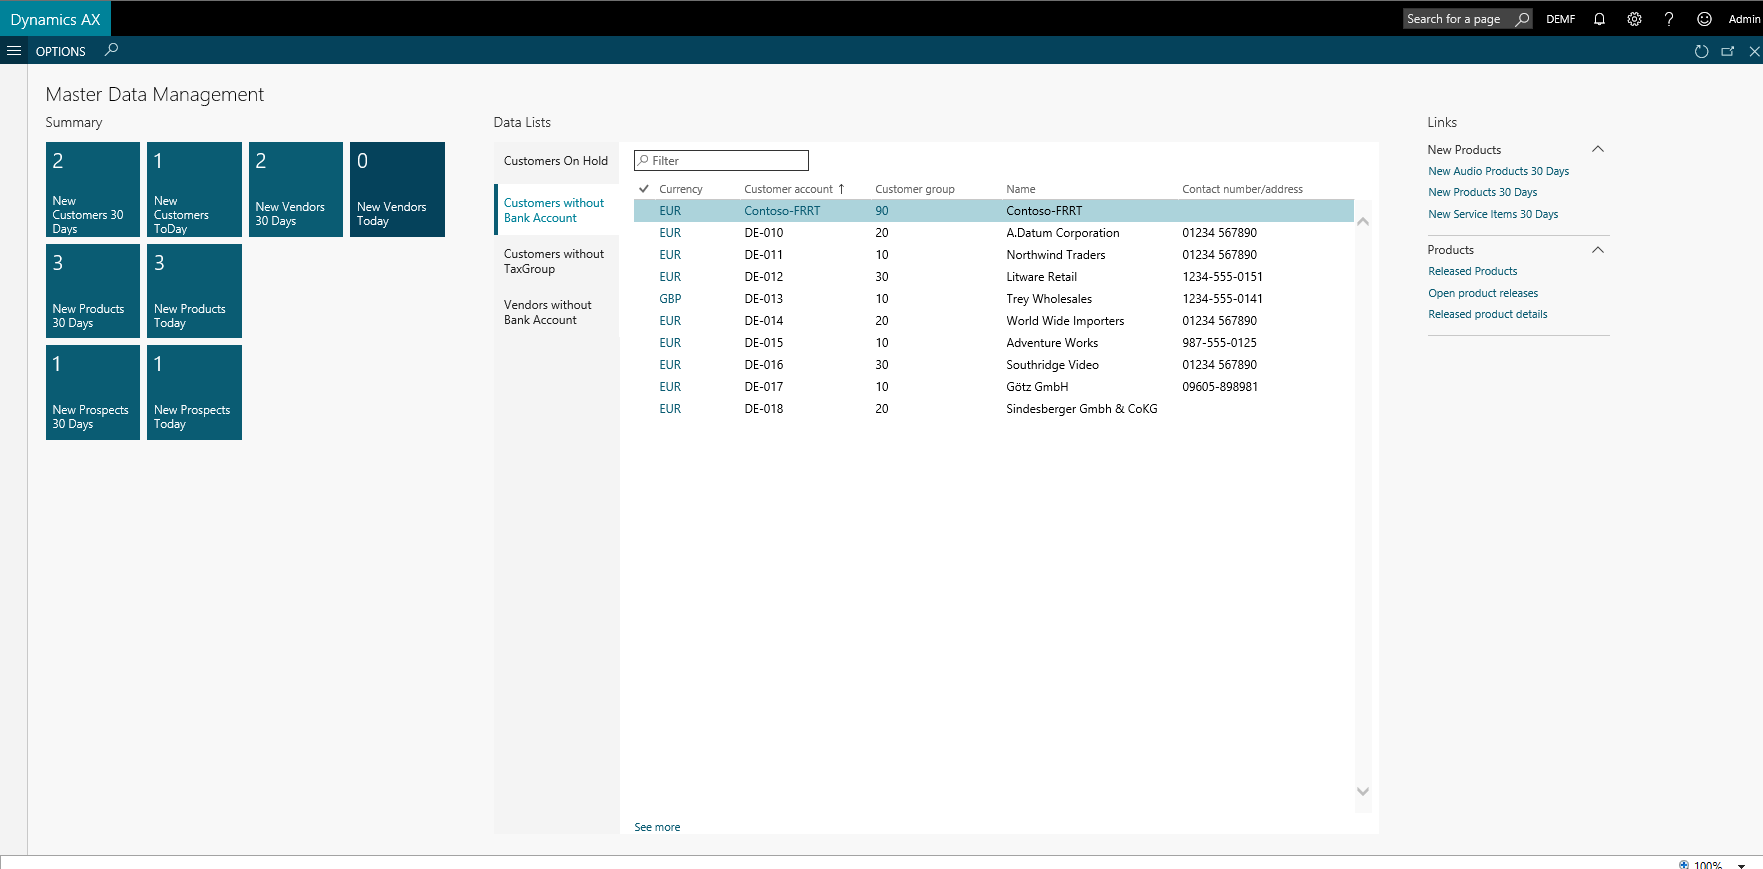
So we can imagine a Master Data Management Workspace containing all new created Master Data entries (Customer, Vendors, Products, …) to go through data qualification as address oder financial Review to create sustainable master data. Another applcation could be Product managment, to bundle all necessary queries and list to create and maintain products within one Workspace.
My Workspace
To Create your own Workspace right click in the Default dashboad in the area below the Standard Workspace Icons

After this Personalize Menu appears. Here you can Add a Workspace.

After giving a usefull name for the new Workspace you can start to create content for the working area.

For this you can use the standard Options to take any existing Details Gridview, create a specific filter using the advanced/filter Sort menu Item within the Options Menu of the List form. I get used for myself to save the advanced filter to reuse this again or to modify it in the future.
Then use Options Menu, then Personalize and select Add to Workspace. Select the Workspace you ceated before to add the filtered Grid to your Workspace.

Create a Tile on Your Workspace
You can now add the filtered view as a Tile, List or a Link appering on the New Workspace. After choosing the Form of Presentation continue with Configure.Then you will be asked to give your filtered Listview a useful Name to present the View on your Workspace.

If you select Show count on the tile the numbers of rows of the previously created View will be displayed on the tile Tliels are placed on the left sie of the Workspace
Create a List on Your Workspace
If you created a List it will be displayed in the middle of the Workspace and you will be asked about the columns to be shown in the resultset. You can choose between to preconfigued grids with up to 3 or 8 columns.

Create a Link on your Workspace
If you just create a Link to a Listview you can use the Option to Group multiple Links within one Group. The Groups of Links and the Links appear on the right side of your Workspace.

On this way i created a Sample for a Master Data Managament Workspace for having one Point of Entry for this role. Without struggling through multiple menu items we can enforce Business and MDM to be more effective in less time.
For selecting date specific queries i used Advanced Date queries feature that calls SysQueryRangeUtil.